Gear & Grills
How to Clean and Maintain Your Grill
Learn how to clean a grill the right way, from quick post-cook grate brushing to seasonal deep cleans that keep your grill performing its best.
Cleaning a grill breaks into two jobs: a 10-minute routine after every cook and a thorough deep clean once or twice a year. Most people skip the routine and then wonder why food tastes bitter or burners heat unevenly. Get consistent with the small stuff, and the big seasonal scrub becomes far less of an ordeal.
What You'll Need
You don't need specialty products. Here's what covers both regular upkeep and a full deep clean:
- Stiff wire grill brush (coil-style or nylon for porcelain-coated grates)
- Long-handled tongs
- Dish soap and hot water
- A bucket or large bin
- Paper towels or old rags
- Cooking oil (vegetable or canola)
- Degreaser or dish soap solution (for the deep clean)
- Gloves (the inside of a lid is grimy work)
For gas grills, add a thin wire or pipe cleaner for clearing burner ports and a soft-bristle brush for the firebox walls.
After Every Cook: The 10-Minute Routine
This is the habit that makes everything else manageable. Do it while the grill is still warm, not stone cold the next morning.
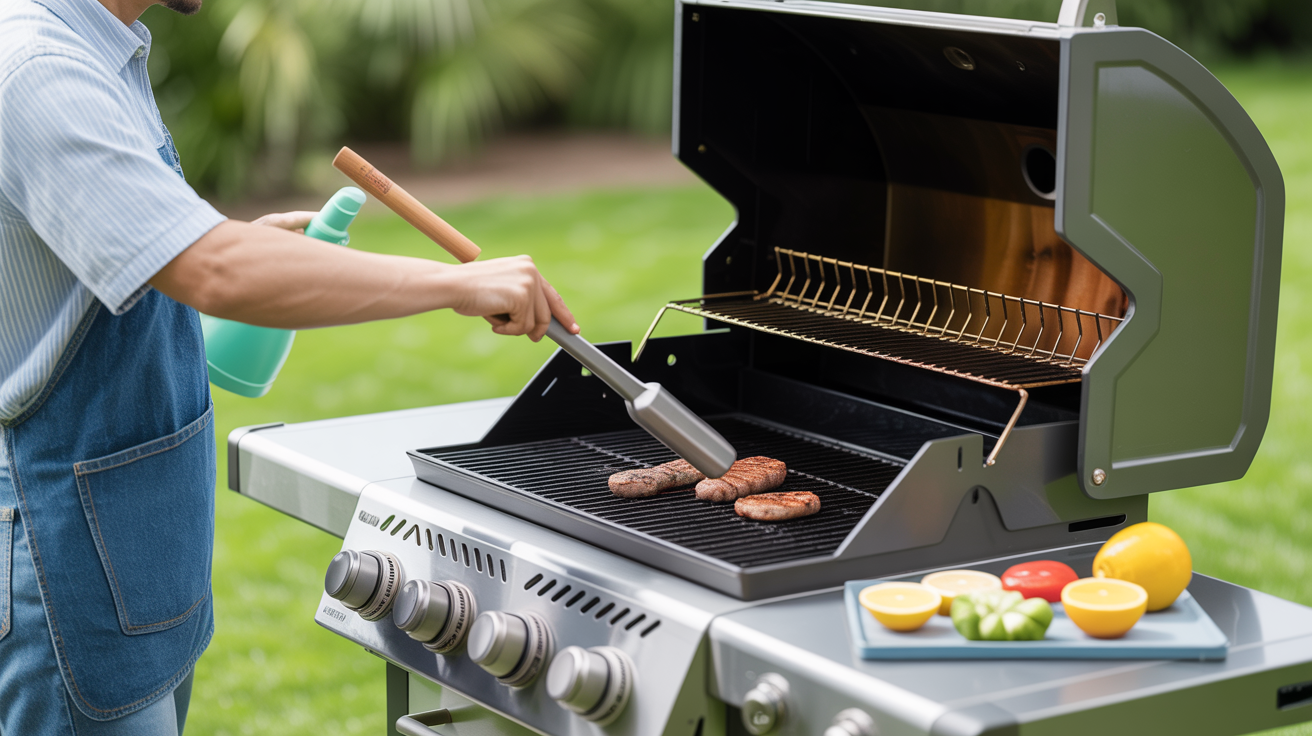
Burn Off the Grates, Then Brush
After pulling your food, crank all burners to high (or bank charcoal to one side and close the lid) and let the grill run at full heat for 10 minutes. You're burning off stuck-on debris so it turns to ash and releases. Then scrub the grates while they're still hot.
Hot grates shed residue far more easily than cold ones. A few firm passes with a brush usually does it. If you use cast iron grates, follow with a very light wipe of cooking oil on a folded paper towel held with tongs. That thin film prevents rust between cooks.
One note on wire brushes: inspect the bristles before every session. Loose wires are a genuine hazard. If your brush is shedding, replace it. A coil-style brush or a ball of crumpled aluminum foil gripped with tongs both work as alternatives.
Empty the Drip Tray or Ash Catcher
Gas grills collect rendered fat in a drip tray under the firebox. Let it cool, slide it out, and toss the grease. A foil liner makes this a 30-second swap. A tray that overflows is a grease fire waiting to happen, and grease fires are what damage grills beyond cleaning.
On a charcoal kettle, dump the ash once it's completely cold. Ash holds moisture and accelerates rust at the bottom of the bowl. Takes two minutes.
Deep Cleaning Your Grill (Once or Twice a Year)
Plan a thorough deep clean at the start of grilling season and again before putting the grill away in fall. This is where you reach what the after-cook routine can't.
Gas Grill Deep Clean
Step 1: Disconnect the propane tank. Never clean a gas grill with fuel connected.
Step 2: Remove and soak the grates and flavorizer bars. Pull out the cooking grates and the angled metal pieces that sit above the burners (these vaporize drippings and add flavor). Soak both in hot, soapy water in a bucket for 20 to 30 minutes. A diluted degreaser speeds things up on heavily soiled pieces.
Step 3: Clean the burners. Remove the burners if your model allows it. Use a soft brush on the exterior, and a thin wire to clear clogged ports (the small holes where gas exits). Clogged ports cause uneven heating and cold spots across the cook surface. Brush the ports side-to-side, not end-to-end, so you don't push debris further in.
Step 4: Clean the firebox interior. Use a putty knife or scraper to knock the carbon buildup off the interior walls into the bottom. Scoop or sweep out that debris. A light rinse with water is fine as long as you dry everything thoroughly before reassembling.
Step 5: Scrub the lid interior. The flaking carbon inside the lid is what makes food taste bitter. Scrub it off with a stiff brush and a degreaser solution, rinse well, and let it dry fully.
Step 6: Reassemble. Scrub the soaked grates, rinse, dry, and put everything back. For cast iron grates, rub a thin coat of oil over the surface and heat the grill to around 400°F (205°C) for 15 minutes to re-season before the next cook.
Charcoal Kettle Deep Clean
Charcoal grills are simpler but still build up grease on the bowl walls and under the charcoal grate.
Remove both grates. Dump the ash. Scrub both grates with hot soapy water. Inside the bowl, knock off any flaking carbon with a brush, then wipe down the walls. Check the vents at the top and bottom: they should open and close freely without resistance. Stuck vents mean you can't control temperature, which matters whether you're searing at 600°F (315°C) or holding a low-and-slow cook at 250°F (120°C). How your grill type handles airflow has a big effect on results, and it's worth understanding the differences between grill designs if you're thinking about upgrading, as covered in this breakdown of kamado, offset, and kettle smokers.
Grill Maintenance That People Skip
Cleaning handles the visible buildup. Maintenance catches the stuff that causes problems down the road.
Check the Burner Tubes on Gas Grills
Spiders and wasps occasionally build nests inside burner tubes during off-season storage. A blocked tube can cause a flashback, where gas ignites inside the tube instead of at the ports. At the start of each season, check the tubes visually and run a pipe cleaner through them.
Also check the gas hose for cracks, especially near the connection points. A brittle or cracked hose is a safety issue, not a cosmetic one. If the hose looks degraded, replace it before cooking again.
Season Cast Iron Grates
Cast iron holds heat well and creates excellent sear marks, but it rusts if you neglect it. After every cook, brush and oil the grates. After a deep clean, re-season by coating them with a thin layer of oil and heating the grill to 400 to 450°F (205 to 230°C) for 15 to 20 minutes. Let them cool in the grill. A properly seasoned cast iron grate is close to nonstick and far easier to maintain.
Porcelain-coated grates don't need oiling, but they chip under a stiff wire brush. Use a coil brush or nylon scrubber instead to avoid exposing the metal underneath.
Cover and Store the Grill Properly
A grill cover is worth buying. UV exposure, rain, and standing moisture degrade the exterior finish over a few seasons without one. Choose a cover that can breathe: a fully sealed vinyl cover traps moisture and can cause rust faster than no cover at all. Canvas or polyester with ventilation panels is a better choice.
For long-term off-season storage, remove the propane tank (store it outdoors, not in an attached garage), cover the grill, and stuff a rag in the exhaust vent to keep insects from nesting. Check on it at least once during the storage period.
Frequently Asked Questions
How often should I clean my grill grates?
Brush the grates after every cook while they're still hot. That 5-minute habit prevents serious buildup and keeps food from sticking at the start of the next cook. A full soak-and-scrub every few weeks or after heavy use is enough to stay on top of things.
Can I use aluminum foil instead of a grill brush?
Yes. Crumple a sheet of heavy-duty foil into a ball, grab it with long tongs, and scrub the grates while hot. It won't reach into every crevice as well as a brush, but it gets the surface clean and there's no risk of stray metal bristles.
Why does my food have a bitter or acrid taste?
Flaking carbon on the inside of the lid is the most common cause. It falls onto food during the cook. Scrub the lid interior during your next deep clean and the problem usually clears up. If the taste persists, check whether old grease in the drip tray is burning off below the grates.
How do I clean grill grates without removing them?
Heat the grill to full temperature for 10 minutes, then scrub with a brush. For stubborn residue on cold grates, lay a wet newspaper or damp cloth over the surface for 20 to 30 minutes to loosen the buildup, then brush it off.
How do I know if my grill needs a new part rather than just a cleaning?
Uneven heat that persists after cleaning the burner ports often points to a corroded burner that needs replacing rather than more scrubbing. A probe thermometer placed at grate level at each end of the cooking surface tells you quickly whether the heat distribution is off. A good meat thermometer earns its keep for this kind of diagnostics as much as for checking doneness.